

Option 1: Create a payment via QR Code (manual)
In this mode, you generate a dynamic QR Code for each transaction. The end customer scans the code or uses the “copy and paste” link to make the payment.1. Access the Payin list
After logging into your Dashboard, go to the left-hand menu and find Payin. Then access Payin List to start a new request or to view the list of all received payins.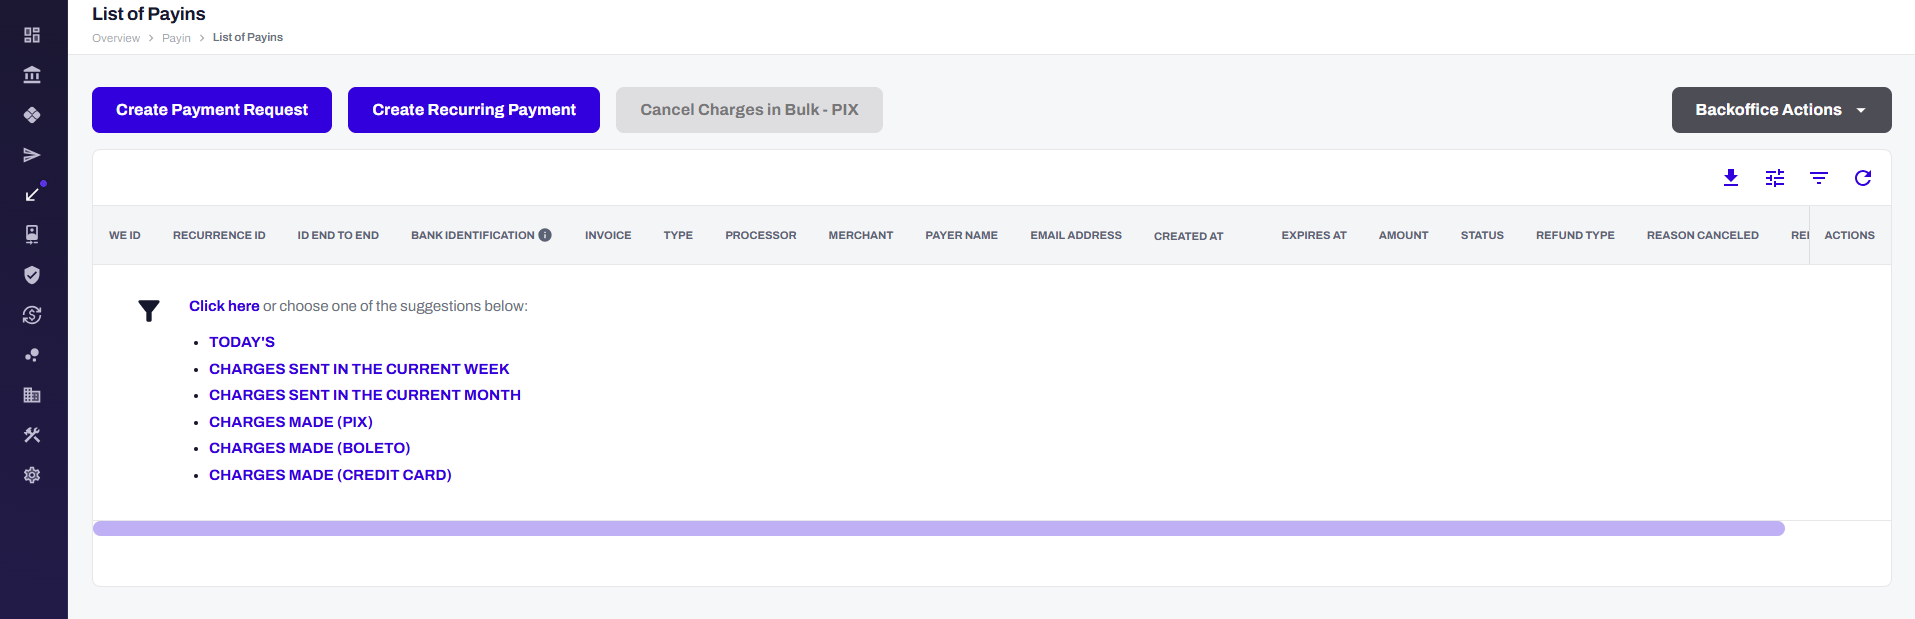
2. Click on “Create Payment Request”
On this page, click “Create Payment Request” and the following page will open for you to fill in the required information.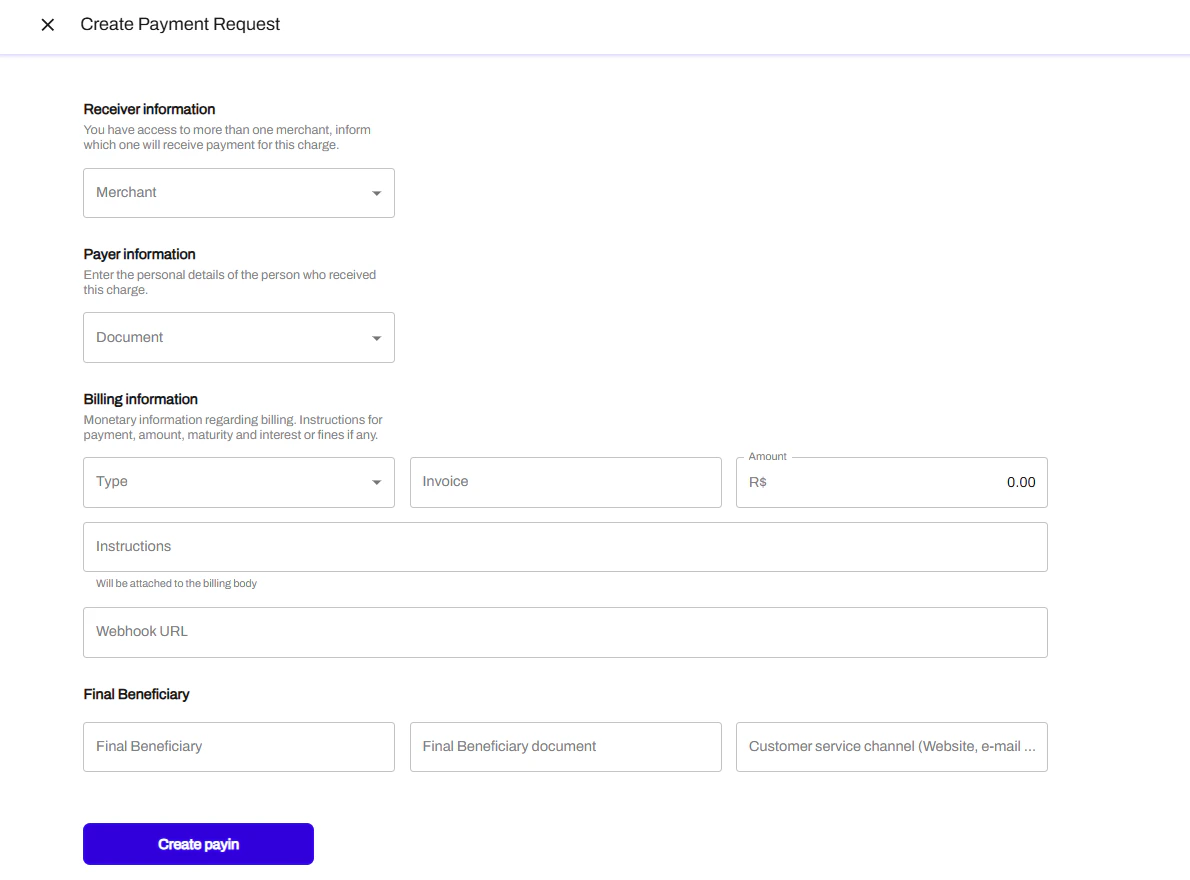
3. Fill in the request details
4. Finalize creation
After filling in all fields, confirm the creation. The system will generate a QR Code and a “copy and paste” link to share with the customer.When to use this option
- You need to control each payment individually
- Each transaction has different amounts or deadlines
- You want to track the status of each charge in the Dashboard
Option 2: Receive via Pix Key (automatic)
In this mode, you register a Pix Key in the Dashboard and share it with your customers. When a payment is made to this key, the system:- Automatically detects the receipt
- Automatically creates the Payin in the Dashboard and API
- Updates the transaction status as the payment progresses
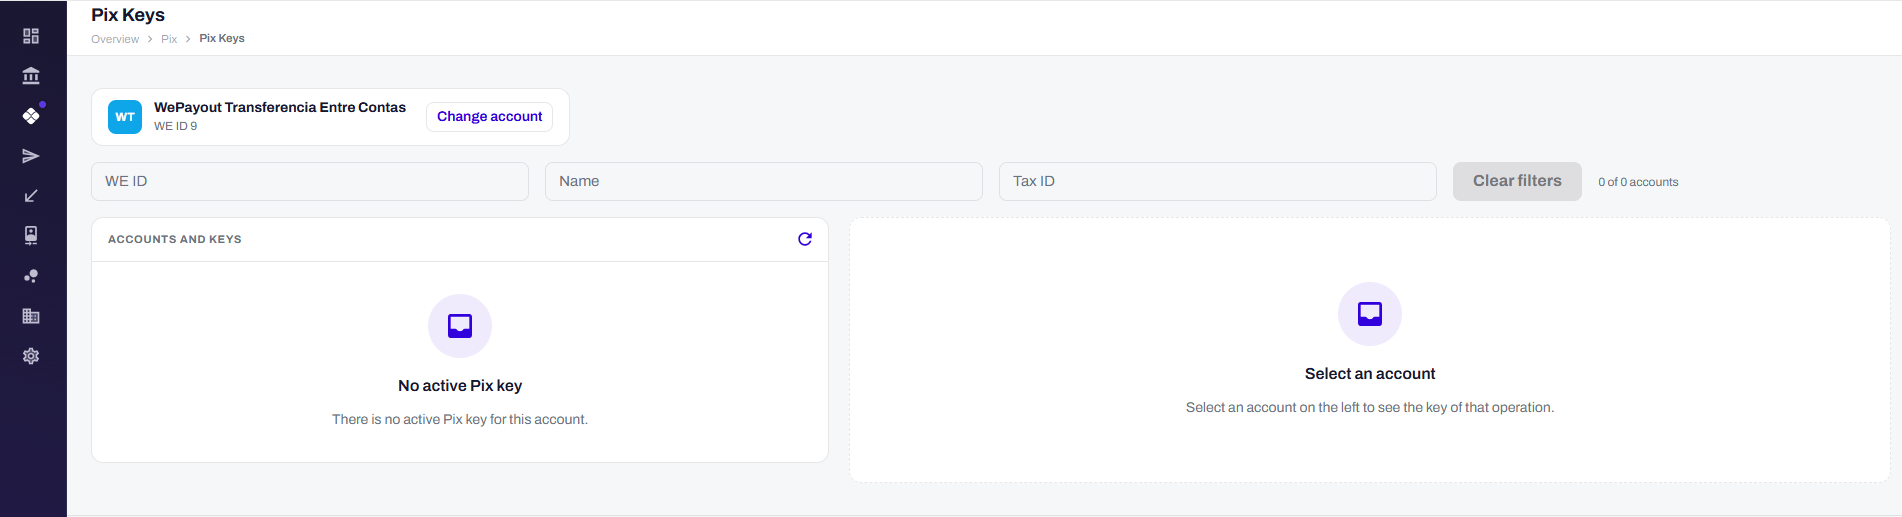
How to configure your Pix Key
When to use this option
- You want a simpler, frictionless payment flow
- You don’t need to manually create each transaction
- You want the system to automatically record all payments received via Pix
💡 With a Pix Key, you eliminate the manual charge creation step. Just share the key and the system handles the rest.
Comparison: QR Code vs. Pix Key
How it appears in the Dashboard and API
When a payment is made via QR Code, the charge already exists in the system from the moment of creation. When a payment is made via Pix Key, the system automatically creates the transaction at the moment the funds are credited. This means:- You will find the transaction in the Payin List with all payment details
- The transaction is also available via API, with the same status and information
- You can track the payment status normally, just like any other charge
How to get started
- Access your WEpayments Dashboard
- To create manual QR Code charges: go to Payin → Payin List and click “Create Payment Request”
- To set up a Pix Key: go to Pix → Pix Key and register your key
- Share the key with your customers and track incoming payments automatically