

Overview
The account onboarding dashboard is designed to simplify the process of opening new accounts for sub-merchants, partners, and franchises. It guides users through each step, ensuring all required information and documents are collected in an organized manner.Step 1: New Account Request
The process begins in Accounts > Account Opening, anf then with the New Account Request form, where company information, address, and contacts are entered.
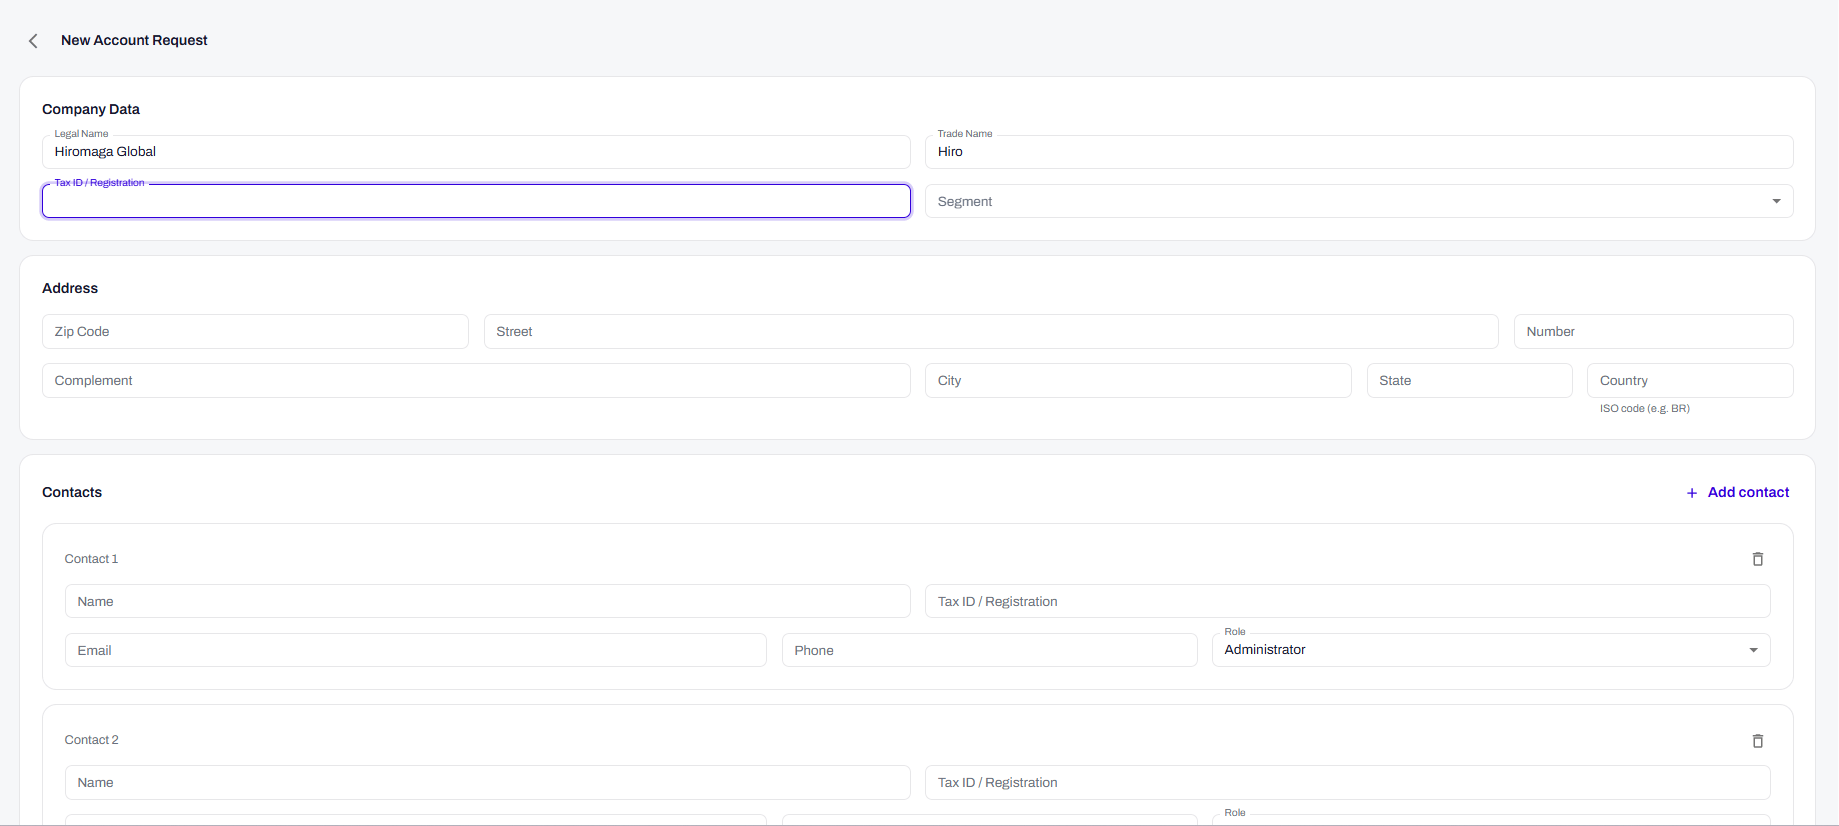
Company Information
Address
Contacts
The company must provide at least two contacts, with different profiles:Contact information
Note: Additional contacts such as Financial or Commercial roles can be added to facilitate internal communication.
Step 2: Review Dashboard
After submitting the request, the dashboard displays a consolidated view of progress with clear indicators.
Progress indicators
Progress bar
The progress bar (displayed as a percentage) shows the overall onboarding progress, based on the number of approved documents relative to the total required.Company details view
The details screen displays:Step 3: Document Submission
When the request status advances to “pending_documents”, the dashboard displays the list of required documents.Document screen features
Rejection example
In the image, a document was rejected with the reason:“Not an official document.”The user can view the document, fix the issue, and resume.

Step 4: Digital Signature (Domestic Companies)
For companies based in Brazil (country = BR), the final step requires signing the contract digitally.Signature screen features
Practical example
Note: Each Legal Representative receives an email link to sign digitally. Onboarding is only completed after all signatures are collected.
Step 5: Account Active
After document approval and, when applicable, contract signature, the account reaches “active” status.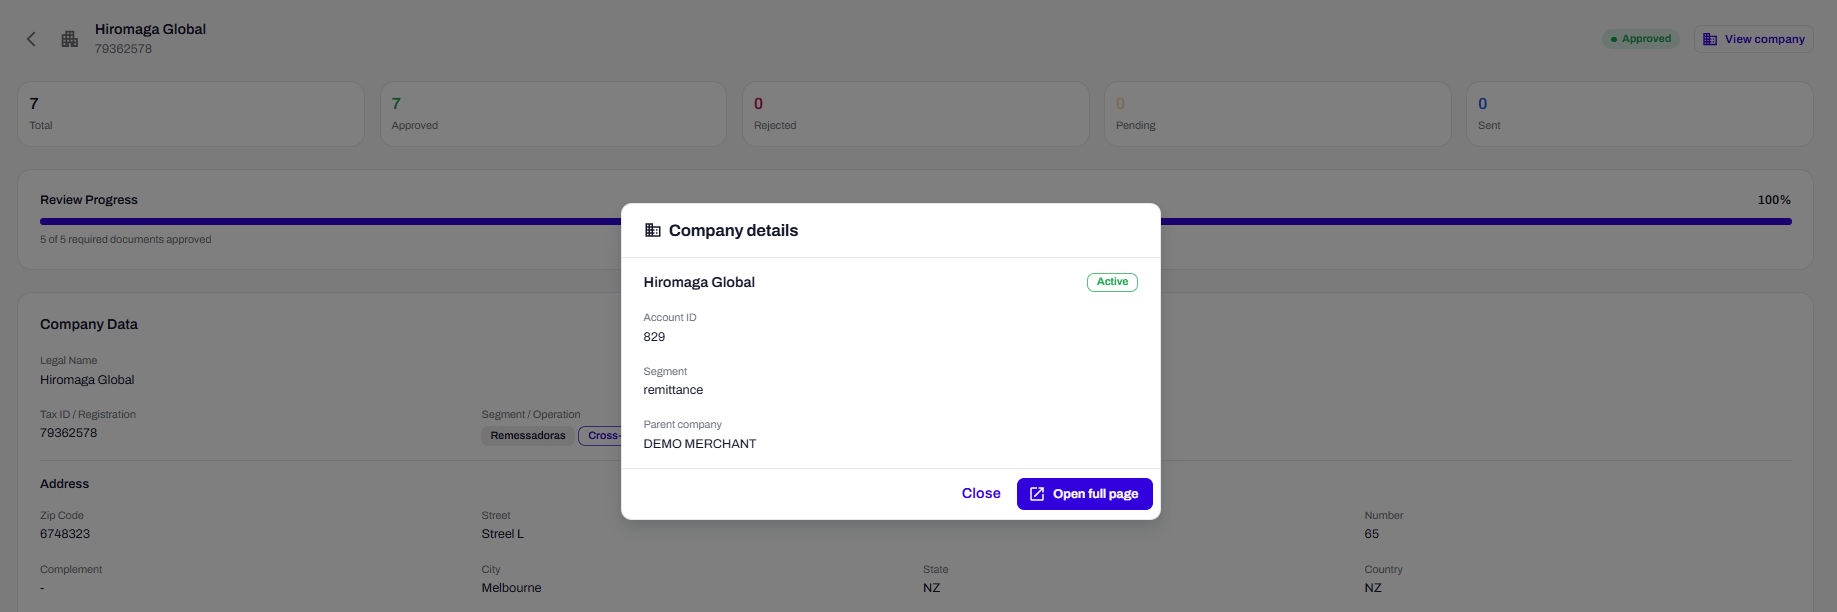
What changes on the screen
Completion example
In the final image, we see:- Total: 7 documents
- Approved: 5
- Pending: 2
- Progress: “5 of 5 mandatory documents approved”
Visual flow summary
Next steps
- Create a request: Go to the Dashboard and click “New Account Request”
- Track progress: Use indicators and the progress bar to monitor status
- Submit documents: Use drag-and-drop upload functionality
- Sign contract: Legal representatives receive the link via email
- Start operating: After activation, use the Account ID to process transactions
Frequently Asked Questions (FAQ)
1. Can I add more than two contacts?Yes. The ”+ Add contact” button allows additional profiles such as Financial or Commercial. 2. What is the difference between Administrator and Legal Representative?
Administrator: Responsible for account management in the dashboard. Legal Representative: Person authorized to sign the contract (partner or attorney-in-fact). 3. What happens if a document is rejected?
The document shows “Rejected” status with the reason. The user must fix the issue and resubmit the file. 4. How do I know which documents to send?
The list of required documents is automatically displayed in the dashboard when the request reaches
pending_documents status.
5. Do I need to sign a contract?Only domestic companies (country = BR) need to sign digitally. Cross-border companies skip this step. 6. How long does document review take?
Timelines vary by case complexity, typically 2 to 5 business days. 7. What is the Account ID?
It’s the unique identifier for the account (Merchant ID). It is generated and displayed when the account is activated. 8. Can I track progress on mobile?
Yes. The Dashboard is responsive and accessible on phone, tablet, or computer.