Documentation Index
Fetch the complete documentation index at: https://support.wepayments.com.br/llms.txt
Use this file to discover all available pages before exploring further.
This guide provides a step-by-step walkthrough on how to create an API user, generate an API key, assign permissions, and configure allowed IP addresses for secure API integration.
Required access
Creating users for API integration and managing permissions are actions restricted to users with Moderator permission.
| Requirement | Details |
|---|
| Permission level | Moderator |
| Who should have this | Legal representatives or persons with formal power of attorney |
| Why | This area is sensitive and should be managed by authorized persons only |
⚠️ For security reasons, Moderator permission should only be granted to legal representatives of the company or persons authorized by legal power of attorney.
Step-by-step API authentication setup
Step 1: Create a dedicated user for API integration
| Action | Instructions |
|---|
| 1. Access Dashboard | Log in with a Moderator user |
| 2. Navigate | Settings > Access Control |
| 3. Create user | Click “Create User” |
| 4. Fill details | Use information specifically for integration purposes (can be a fictitious email) |
| 5. Example | Username: API - Merchant Name / Email: api.merchantname@yourcompany.com |
| 6. Associate company | Select the corresponding company and save |
⚠️ Important: This user should not be used for human login. It may be deleted if linked to an employee who leaves the company. Create it solely for technical/integration use.
Step 2: Assign permissions to the API user
| Action | Instructions |
|---|
| 1. Locate user | Find the newly created user in the list |
| 2. Open user | Click on the user to edit |
| 3. Select permissions | Check the features the API can perform |
| 4. Save | Save the changes |
Available permissions (examples)
| Permission | What it allows |
|---|
| Create charges (payin) | API can create PIX, boleto, and credit card charges |
| Create payments (payout) | API can send payments to beneficiaries |
| View statement | API can retrieve balance and transaction statements |
| Insert KYC documents | API can submit compliance documents |
| Other permissions | Depending on your contract and product |
💡 The permissions available depend on the type of product you have purchased.
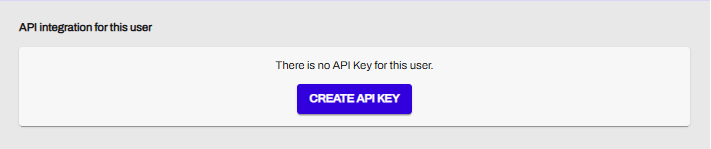
Step 3: Generate the API keyStep 3: Generate the API key
| Action | Instructions |
|---|
| 1. Locate API Key section | On the user editing screenOn the user editing screen |
| 2. Click in “Create API Key | A new screen will open new screen will open |
| 3. Enter IP addresses | |
| 4. Provide 2FA code | Two-factor authentication code is requiredTwo-factor authentication code is required |
| 5. Copy the key5. Copy the key | The key is only shown once – at creation timeThe key is only shown once – at creation time |
| 6. Store securely | Paste and store the key in a safe place |
| 7. Enter into your system | Use this key for API communication with WEpayments |
| 6. Store securely | Paste and store the key in a safe place |
| 7. Enter into your system | Use this key for API communication with WEpayments |
⚠️ Security note: For your security, we request the two-factor authentication code to create an API key, delete it, and add IP addresses to the allowed list⚠️ Security note: For your security, we request the two-factor authentication code to create an API key, delete it, and add IP addresses to the allowed list.
You’ll go to “Preferences” > “Acces Control” > Click in the user > Go to the end of the page > “Create API Key”\
| Action | Details |
|---|
| Why required | Only IPs listed can make calls using the API key – prevents unauthorized access |
| How to add | During API key creation or by editing the user |
| Update when needed | Remember to update allowed IPs if your system infrastructure changes |
Summary: API authentication checklist
| Step |
|---|
| ✅ Create dedicated API user (not for human login) |
| ✅ Assign appropriate permissions (payin, payout, statements, etc.) |
| ✅ Generate API key (copy and store immediately) |
| ✅ Configure allowed IP addresses |
| ✅ Enable two-factor authentication for the Dashboard user |
| ✅ Store API key securely in your system |
Security best practices
| Practice | Why |
|---|
| Use a dedicated API user | Prevents access loss if an employee leaves |
| Minimize permissions | Grant only what the API needs |
| Rotate API keys periodically | Reduces risk of compromised keys |
| Review IP whitelist regularly | Remove outdated or unused IPs |
| Monitor API usage | Detect unusual patterns |
| Never share API keys | Treat them like passwords |