> ## Documentation Index
> Fetch the complete documentation index at: https://support.wepayments.com.br/llms.txt
> Use this file to discover all available pages before exploring further.
# API Authentication
This guide provides a step-by-step walkthrough on how to create an API user, generate an API key, assign permissions, and configure allowed IP addresses for secure API integration.
## Required access
Creating users for API integration and managing permissions are actions restricted to users with **Moderator** permission.
| **Requirement** | **Details** |
| :----------------------- | :---------------------------------------------------------------------- |
| **Permission level** | Moderator |
| **Who should have this** | Legal representatives or persons with formal power of attorney |
| **Why** | This area is sensitive and should be managed by authorized persons only |
> ⚠️ For security reasons, Moderator permission should only be granted to legal representatives of the company or persons authorized by legal power of attorney.
## Step-by-step API authentication setup
### Step 1: Create a dedicated user for API integration
| **Action** | **Instructions** |
| :----------------------- | :-------------------------------------------------------------------------------- |
| **1. Access Dashboard** | Log in with a Moderator user |
| **2. Navigate** | Settings > Access Control |
| **3. Create user** | Click "Create User" |
| **4. Fill details** | Use information specifically for integration purposes (can be a fictitious email) |
| **5. Example** | Username: `API - Merchant Name` / Email: `api.merchantname@yourcompany.com` |
| **6. Associate company** | Select the corresponding company and save |
> ⚠️ **Important:** This user should not be used for human login. It may be deleted if linked to an employee who leaves the company. Create it solely for technical/integration use.
### Step 2: Assign permissions to the API user
| **Action** | **Instructions** |
| :------------------------ | :-------------------------------------- |
| **1. Locate user** | Find the newly created user in the list |
| **2. Open user** | Click on the user to edit |
| **3. Select permissions** | Check the features the API can perform |
| **4. Save** | Save the changes |
### Available permissions (examples)
| **Permission** | **What it allows** |
| :--------------------------- | :-------------------------------------------------- |
| **Create charges (payin)** | API can create PIX, boleto, and credit card charges |
| **Create payments (payout)** | API can send payments to beneficiaries |
| **View statement** | API can retrieve balance and transaction statements |
| **Insert KYC documents** | API can submit compliance documents |
| **Other permissions** | Depending on your contract and product |
> 💡 The permissions available depend on the type of product you have purchased.
## Required access
Creating users for API integration and managing permissions are actions restricted to users with **Moderator** permission.
| **Requirement** | **Details** |
| :----------------------- | :---------------------------------------------------------------------- |
| **Permission level** | Moderator |
| **Who should have this** | Legal representatives or persons with formal power of attorney |
| **Why** | This area is sensitive and should be managed by authorized persons only |
> ⚠️ For security reasons, Moderator permission should only be granted to legal representatives of the company or persons authorized by legal power of attorney.
## Step-by-step API authentication setup
### Step 1: Create a dedicated user for API integration
| **Action** | **Instructions** |
| :----------------------- | :-------------------------------------------------------------------------------- |
| **1. Access Dashboard** | Log in with a Moderator user |
| **2. Navigate** | Settings > Access Control |
| **3. Create user** | Click "Create User" |
| **4. Fill details** | Use information specifically for integration purposes (can be a fictitious email) |
| **5. Example** | Username: `API - Merchant Name` / Email: `api.merchantname@yourcompany.com` |
| **6. Associate company** | Select the corresponding company and save |
> ⚠️ **Important:** This user should not be used for human login. It may be deleted if linked to an employee who leaves the company. Create it solely for technical/integration use.
### Step 2: Assign permissions to the API user
| **Action** | **Instructions** |
| :------------------------ | :-------------------------------------- |
| **1. Locate user** | Find the newly created user in the list |
| **2. Open user** | Click on the user to edit |
| **3. Select permissions** | Check the features the API can perform |
| **4. Save** | Save the changes |
### Available permissions (examples)
| **Permission** | **What it allows** |
| :--------------------------- | :-------------------------------------------------- |
| **Create charges (payin)** | API can create PIX, boleto, and credit card charges |
| **Create payments (payout)** | API can send payments to beneficiaries |
| **View statement** | API can retrieve balance and transaction statements |
| **Insert KYC documents** | API can submit compliance documents |
| **Other permissions** | Depending on your contract and product |
> 💡 The permissions available depend on the type of product you have purchased.
### Step 3: Generate the API keyStep 3: Generate the API key
| **Action** | **Instructions** |
| :--------------------------------- | :------------------------------------------------------------------------------------------------- |
| **1. Locate API Key section** | On the user editing screenOn the user editing screen |
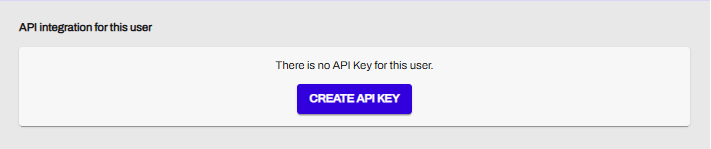
| **2. Click in "Create API Key** | A new screen will open new screen will open |
| **3. Enter IP addresses** | |
| **4. Provide 2FA code** | Two-factor authentication code is requiredTwo-factor authentication code is required |
| **5. Copy the key5. Copy the key** | The key is only shown **once** – at creation timeThe key is only shown **once** – at creation time |
| **6. Store securely** | Paste and store the key in a safe place |
| **7. Enter into your system** | Use this key for API communication with WEpayments |
| **6. Store securely** | Paste and store the key in a safe place |
| **7. Enter into your system** | Use this key for API communication with WEpayments |
> ⚠️ **Security note:** For your security, we request the two-factor authentication code to create an API key, delete it, and add IP addresses to the allowed list⚠️ **Security note:** For your security, we request the two-factor authentication code to create an API key, delete it, and add IP addresses to the allowed list.
You'll go to "Preferences" > "Acces Control" > Click in the user > Go to the end of the page > "Create API Key"\\
 ### Step 4: Configure allowed IP addresses
| **Action** | **Details** |
| :--------------------- | :------------------------------------------------------------------------------ |
| **Why required** | Only IPs listed can make calls using the API key – prevents unauthorized access |
| **How to add** | During API key creation or by editing the user |
| **Update when needed** | Remember to update allowed IPs if your system infrastructure changes |
## Summary: API authentication checklist
| **Step** |
| :----------------------------------------------------------------- |
| ✅ Create dedicated API user (not for human login) |
| ✅ Assign appropriate permissions (payin, payout, statements, etc.) |
| ✅ Generate API key (copy and store immediately) |
| ✅ Configure allowed IP addresses |
| ✅ Enable two-factor authentication for the Dashboard user |
| ✅ Store API key securely in your system |
## Security best practices
| **Practice** | **Why** |
| :-------------------------------- | :----------------------------------------- |
| **Use a dedicated API user** | Prevents access loss if an employee leaves |
| **Minimize permissions** | Grant only what the API needs |
| **Rotate API keys periodically** | Reduces risk of compromised keys |
| **Review IP whitelist regularly** | Remove outdated or unused IPs |
| **Monitor API usage** | Detect unusual patterns |
| **Never share API keys** | Treat them like passwords |
### Step 4: Configure allowed IP addresses
| **Action** | **Details** |
| :--------------------- | :------------------------------------------------------------------------------ |
| **Why required** | Only IPs listed can make calls using the API key – prevents unauthorized access |
| **How to add** | During API key creation or by editing the user |
| **Update when needed** | Remember to update allowed IPs if your system infrastructure changes |
## Summary: API authentication checklist
| **Step** |
| :----------------------------------------------------------------- |
| ✅ Create dedicated API user (not for human login) |
| ✅ Assign appropriate permissions (payin, payout, statements, etc.) |
| ✅ Generate API key (copy and store immediately) |
| ✅ Configure allowed IP addresses |
| ✅ Enable two-factor authentication for the Dashboard user |
| ✅ Store API key securely in your system |
## Security best practices
| **Practice** | **Why** |
| :-------------------------------- | :----------------------------------------- |
| **Use a dedicated API user** | Prevents access loss if an employee leaves |
| **Minimize permissions** | Grant only what the API needs |
| **Rotate API keys periodically** | Reduces risk of compromised keys |
| **Review IP whitelist regularly** | Remove outdated or unused IPs |
| **Monitor API usage** | Detect unusual patterns |
| **Never share API keys** | Treat them like passwords |